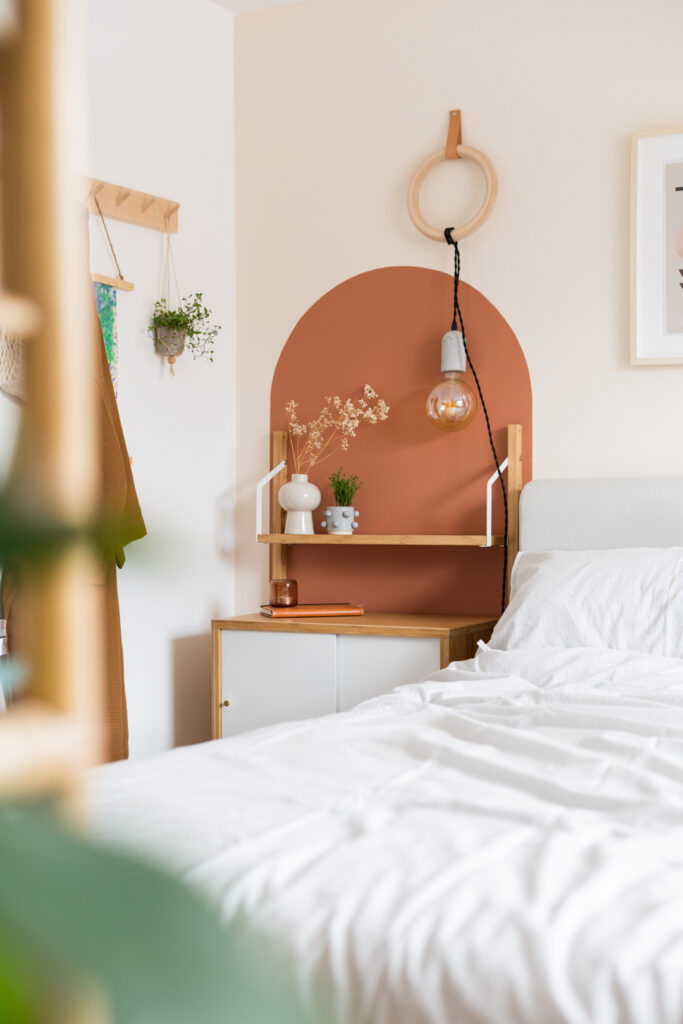
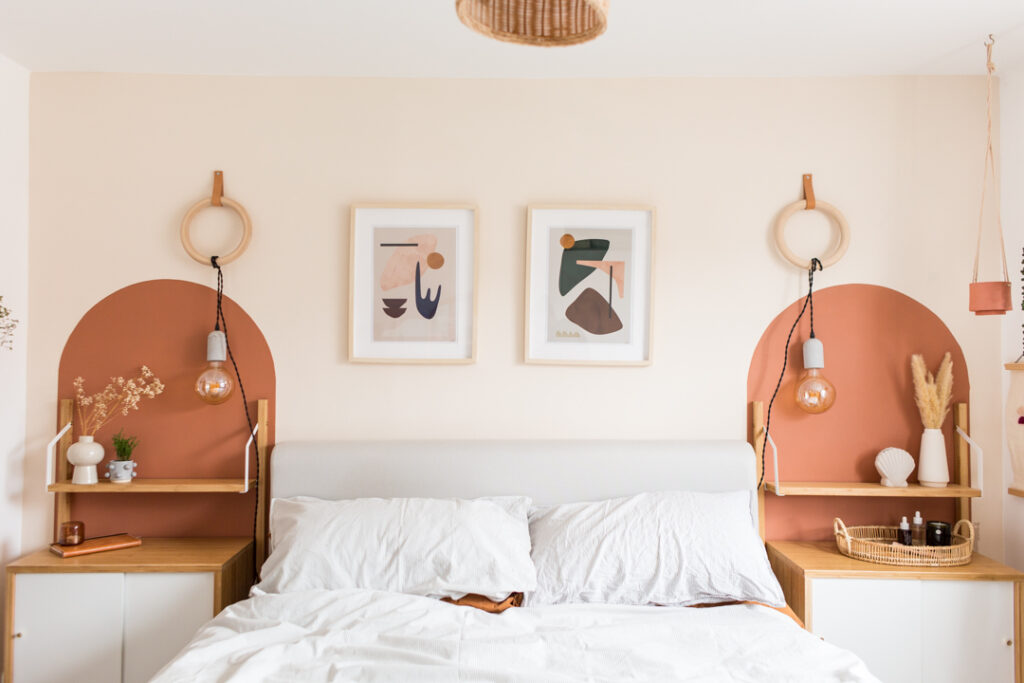
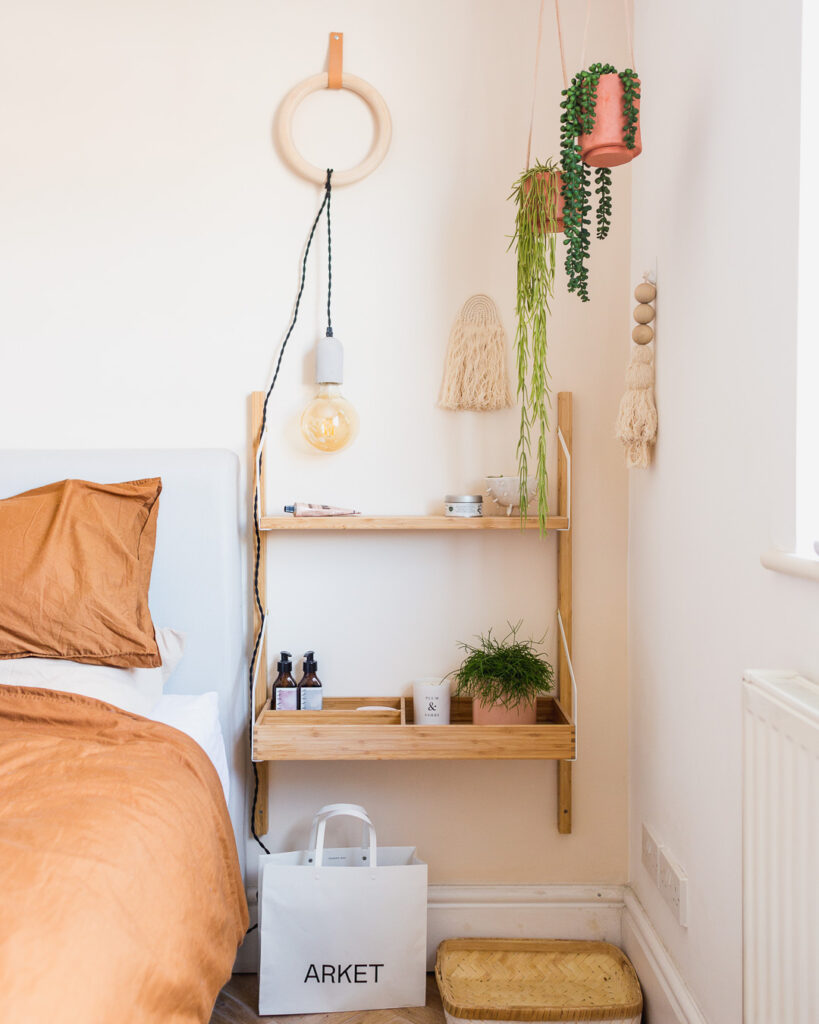
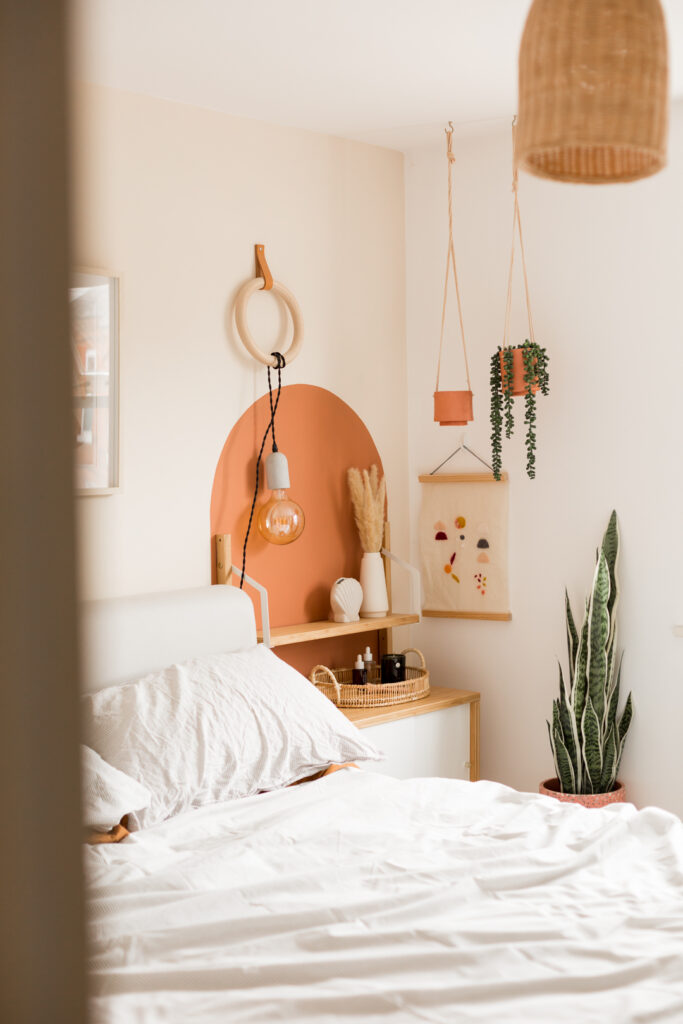
Ok, so these DIY painted wall arches might be my favourite home decor DIY to date! It’s definitely up there in my top five, without a doubt. I’ve been seeing more of these cute arches all over Pinterest and Instagram recently and it gave me an idea to create a quick refresh in my bedroom. I had planned to paint the entire wall behind my bed, but this was so much quicker and as I was changing up my IKEA SVALNÄS system anyway, it seemed like the perfect opportunity to go big!
Even though I was pretty happy with what was here before, I’ll show you the before and after below. This colour has made such a tremendous impact on the room and going bold has really paid off. In fact, it’s made me question why I’ve been so afraid of using stronger colours in the rest of my house! Expect to see all the painting time-lapses over on Instagram from now on!
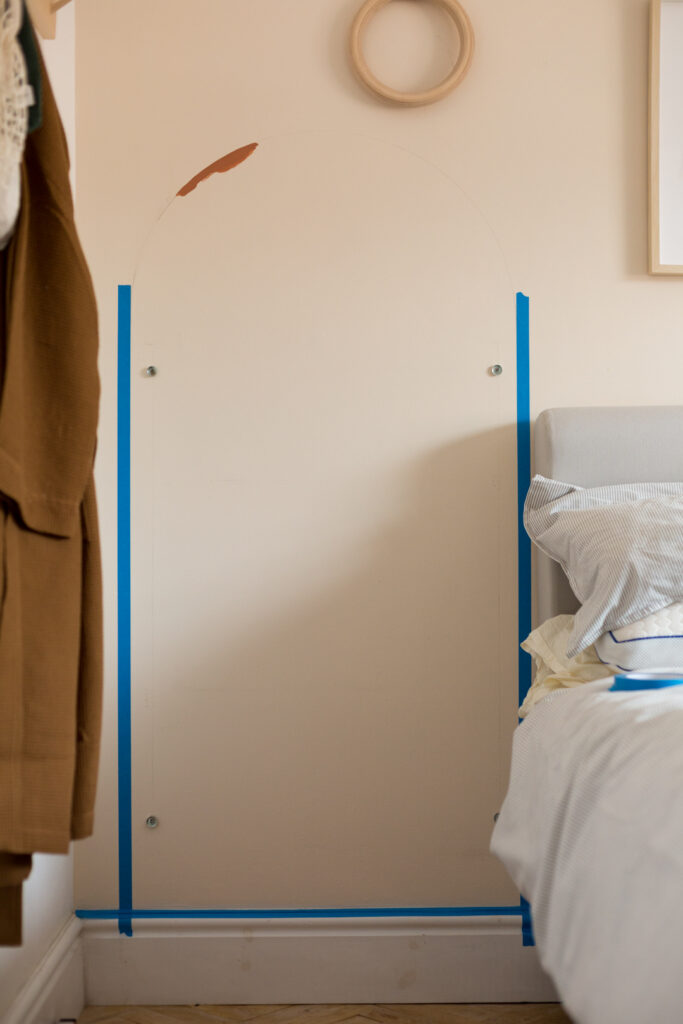
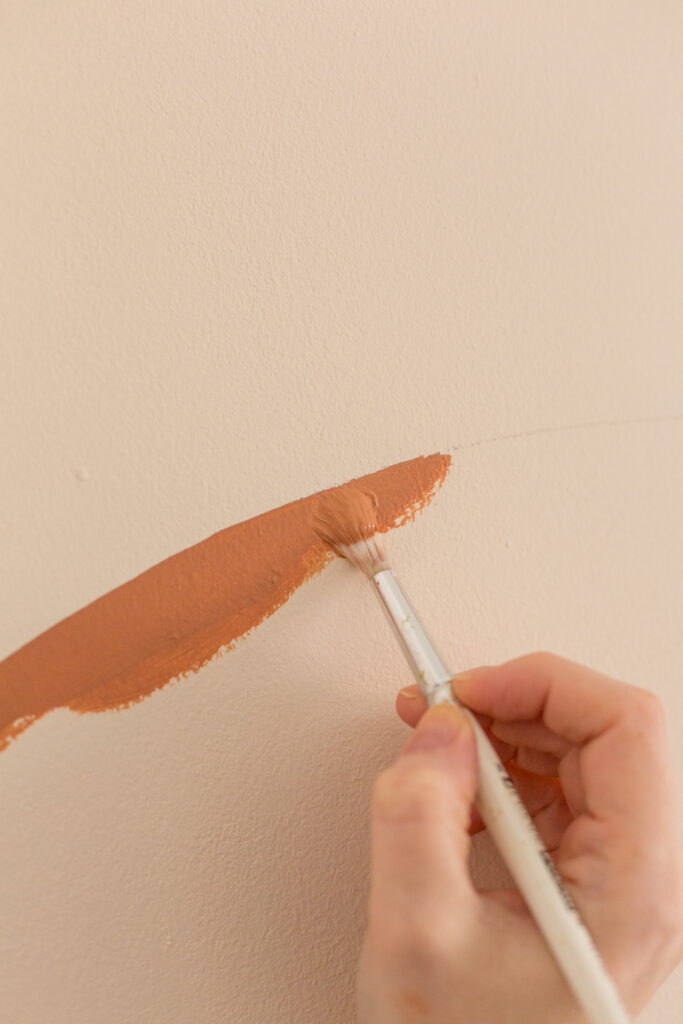
The technique to create these arches is easy and quick but requires a steady hand. After drawing the design (I’ll show you that step below) I used an artist paintbrush to paint in the curve then painter's tape (not just regular masking tape) to section off the straight edges. I have a few more tips for stopping bleeding and getting your lines straight below!
You’ll need:
Paint (I used Crown/Elle Decoration Cushion Craze) + Masking tape + Pencil + String + Painter's tape + Artist paintbrush + Roller and tray
Make a rough mark on the wall where you’d like your arch to start and finish. Measure the distance between these marks and divide by two.
Tie one end of a piece of string around a pencil. Measure from the pencil your measurement from step one. Add on 1 cm and cut the string.
Find the centre point of your arch between your initial marks and hold the last 1 cm of string between your thumb and the wall at this point. If you have one to hand a thumb, tac makes the next step easier. Hold the string against the wall using the thumb tac at the 1 cm point.
Place the tip of the pencil on the wall at the first of your previous marks, then slowly move the pencil up and over the centre point, keeping the string tight at all times until you reach the other side. TIP–Keep the pencil line light so you can easily rub it out if you need to.
Once you’re happy with the arch, run two pieces of painter's tape down from the ends of the arch to the floor. A really easy way to make sure these are straight is to hold the string with the pencil attached at the edge of the arch. Tape the opposite end to the pencil at the starting point and use the hanging cord as a guide to creating a straight line with your painter's tape.
Starting with the arch paint the edge of the template. When you’re trying to paint a neat line, don’t start at the line. Start painting just under the line, then press the paintbrush down into the wall to create a large flat surface. Move this slowly towards and along the line for maximum control.
Once you’ve painted along the arch, use the same brush to paint over the masking taped edges. To minimise bleeding, paint from the tape to the wall.
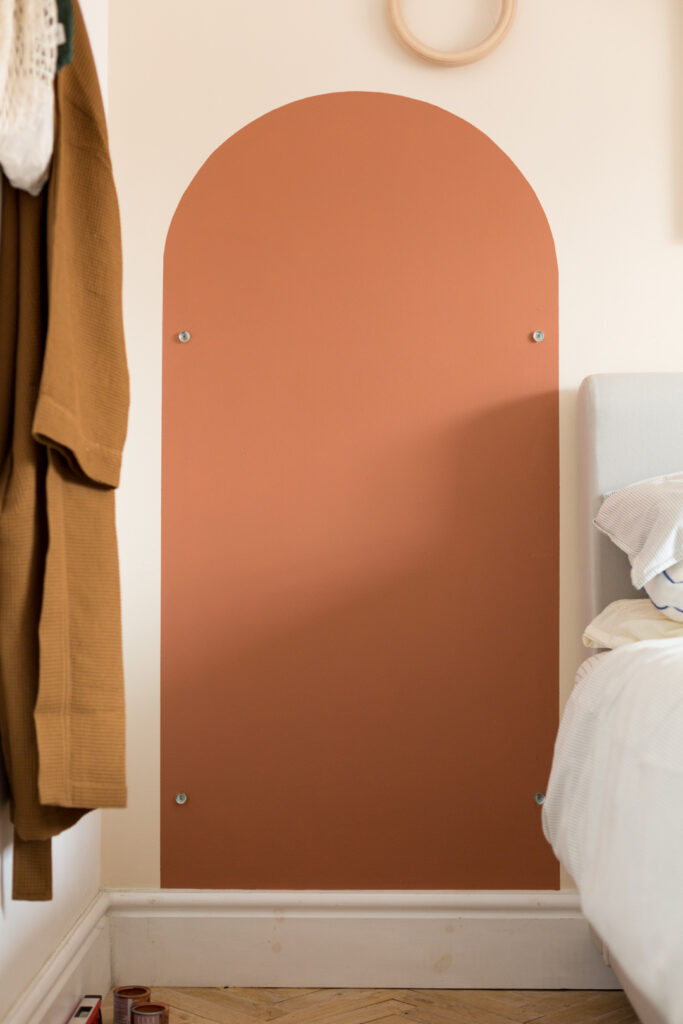
After painting the edge, fill in the inside using the roller. I needed three coats of this paint to get a solid finish.
Once you’ve finished the last coat, peel back the tape and stand back and admire your beautiful new arch while you watch the paint dry. Honestly, that’s pretty much what I did, it’s so pretty!


Comments
Post a Comment